All Projects


Sailor's Bow
Date Posted:20 February 2025
Creating these beautiful bows is incredibly simple, making them the perfect project for beginners and experienced crafters alike! With just two pieces of fabric and either a plain hair clip or a hair tie, you can craft a stylish, handmade accessory in no time.
This tutorial works best with cotton or satin fabric, as they provide structure and a polished look. However, you can easily experiment with different materials such as lace for a delicate, vintage feel, chiffon or silk for an elegant touch, velvet for a luxurious look, or even denim for a trendy, casual vibe.
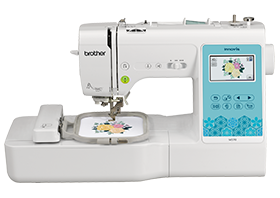
Machines Used
- Brother NV50S Sewing Machine
What you'll need:
- Sewing machine
- Sewing scissors
- Iron + Ironing Board
- Pins or clips
- Thread (in your colour choice)
- Fabric (in your pattern choice)
- Ruler
- Washable pen/tailors chalk
- Hand stitching needle
- Hot glue gun (optional)
- Plain metal hair clip
Tip:
Don't have an overlocker? Use a built-in zig zag stitch on your machine to finish off the edges to stop the fabric from fraying.
Step Overview
The steps below are just an overview of the project instructions and must be used in conjunction with the tutorial video. Print these steps out to have beside you when watching the video as a reminder.
- Cut 1 rectangle that is 6” wide and 20” long.
- Cut 1 rectangle that is 2 ½” wide and 3” long.
- Fold your large rectangle in half lengthways, with right sides together.
- With your ruler, measure 3” along the top (raw edge) from the left side.
- With your washable pen (or tailors chalk) draw a straight line between the 3” mark on the top, and the bottom corner. This should make a triangle shape.
- Repeat on the right side.
- Measure ½” down from the top edge (raw edge) and mark a straight line from the diagonal lines, all the way across the top of the fabric.
- Fold your fabric in half widthways to find the centre point.
- Make a 1” mark on either side of the centre point. This will be our turning hole.
- Sew a straight line directly over the drawn lines, excluding the 2” gap in the centre.
- Trim the seam allowance down to ¼” and clip the corners. Set aside.
- Fold your smaller rectangle in half lengthways with right sides together.
- Fold one end over ¼” and pin in place.
- Sew down the long raw edge with a ½” seam allowance.
- Trim the seam allowance down by ¼”.
- Turn your tube right side out and press flat with your iron. Do the same for your larger rectangle. Use a chopstick or the end of your scissors to poke the corners sharp.
- Press each piece flat with your iron, making sure you tuck in the turning hole on the large rectangle before pressing. Set aside your smaller piece.
- With the large rectangle, fold over each pointed end slightly on an angle. You should roughly measure 4” width of fabric at the top.
- With your hand stitching needle, sew a long running stitch down the centre of the bow, starting at the top.
- Pull your thread tight and loop the excess thread around the middle and tie it tightly to secure the bunching.
- Fold your small rectangle around the middle of the bow and hand stitch the raw end down to the back of the bow.
- Hand stitch the other end on top of the first end.
- Use your hot glue gun to attach the metal clip or slip it underneath the loops.
- And you’re done!
Don’t forget to show us your finished projects on Instagram or Facebook #echidnasewing #madebyme


Free Embroidery Designs
We're excited to offer our free Echidna designs available for download. These free designs are perfect for those at a beginner or an advanced level. Add these designs to your stash and create incredible embroidery!
View all free designs >
Sewing, Quilting and Embroidery Machines
Interested in learning how to sew, quilt or embroider? Take a look at the innovative Brother machines available for purchase at Echidna Sewing. Wherever possible we will beat any deal and you will always receive ongoing service and support!
Find out more >
Learn to Sew or Embroider with Echidna Sewing
Come along to our fun-filled classes to learn more about sewing, embroidery and crafting. Classes cater for all skill levels, whether you're just starting out or already have advanced knowledge.
Find out more >
Echidna project material/ fabric requirements are an indication only and can seem to be generous. This has been intentional. Should you make a cutting or embroidery mistake you will have sufficient fabric to rectify your error.